Weekend Ravioli
 I recently became addicted to making ravioli. My kids love butternut squash and mushroom ravioli and campaign for both every week. It only recently occurred to me that making ravioli was straight forward and if you ignore most of the disciplines of baking it is similar to making bread. This is my weekend ravioli recipe. I call it my weekend ravioli recipe because it takes a bit of time to make and is a bit of a mess. That said you can get your kids involved and the process itself can be entertaining. This recipe makes about 60 ravioli. Whatever you don’t eat can be frozen for the following week. Do yourself a favor and get a bench knife for this. It makes cutting, moving, and shaping the ravioli a lot easier.
Process - the equipment
- scale
- bench knife
- pasta maker/roller
Process - the dough (1 hour)
- 450g pizza/pasta flour (type 00)
- 150g semolina flour
- 1tsp salt
- 6 eggs
- 1/8 cup water
Mix all of the ingredients except the water in a bowl. Add water a bit a time. Make sure not to add too much water here. Your dough should be pliable but not stretchy. It should be kind of difficult to knead.
Knead the dough until you have a nicely kneaded yellow dough ball. About 10 minutes. Wrap the dough ball in plastic wrap and place in the refrigerator for an hour. Now is a good time to make your filling.
Process - the roll
 Take the dough out of the refrigerator and split it into three equal parts. Flatten the dough out into a rectangle. You can fold the top and bottom to get more of a rectangular shape.
Set the pasta maker to the widest setting. Feed the flattened dough through the roller three times. I find that folding both sides into each other (like an envelope fold) after each feeding through the machine results in a more symmetrical shape.
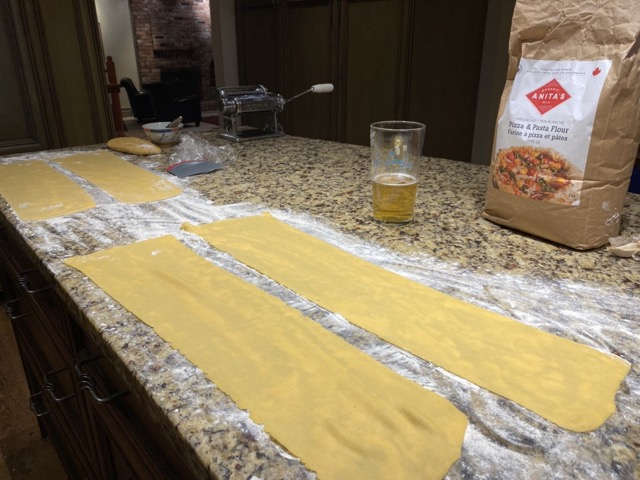
Set the pasta maker to a narrower setting (I use 3 for this step). Feed the dough through the roller on this setting twice. You should now have a sheet a couple feet long and 8 inches wide.
For the final pass, set the past maker to a narrower setting still (I use 6 for this step). Cut the sheet you are going to feed through the machine in half. (unless you want to struggle with a long sheet of pasta. It is sometimes fun for the kids). Feed each half sheet through the roller and set aside on a floured surface for filling. You should have two sheets now (one for the top and one for the bottom).
Process - the blops
 Prep the sheet you will use for the bottom of the ravioli by brushing it with a bit of water. Go easy on the water here. You need just enough so the other sheet can bond.
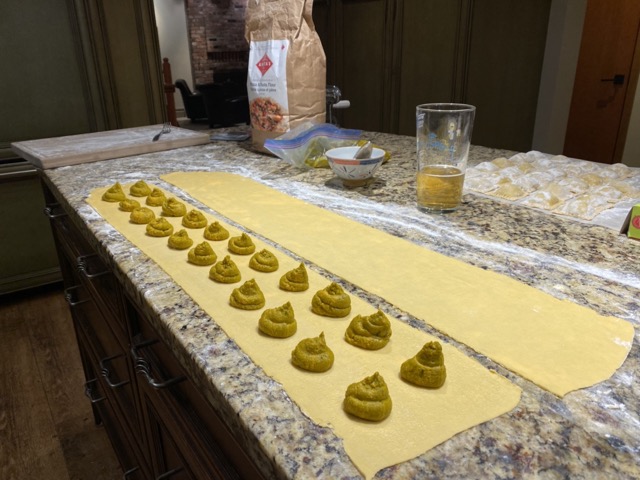
The blops can be done with a spoon, though I recommend either buying or making piping bags. It makes the job much more precise and the fillings make fun little turd emojis your kids will like. The filling can go two by two down the length of the sheet leaving enough room between fillings so you can cut and shape. I estimate around a heaping tablespoon of filling per blop.
Process - the shaping
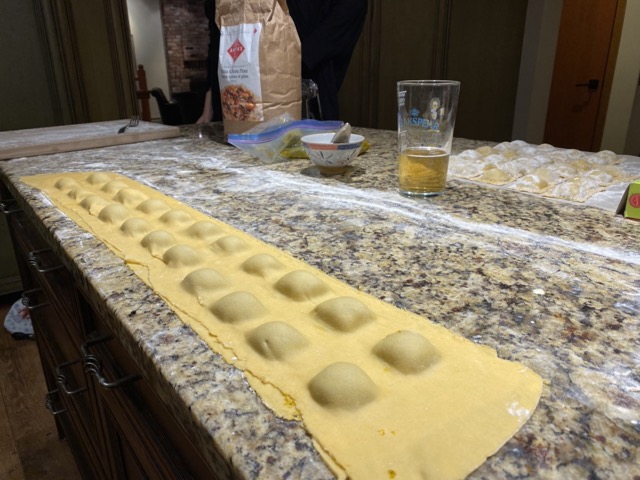 This is the part that requires a bit of practice. Don’t get discouraged by your first attempt. Take the sheet you’ll use for the top and place on top of the blops. Be sure to cover all of the blops. Do not seal the edges yet. Instead start at one side and work your way down with your fingers bonding the top sheet with the bottom sheet while simultanously shaping the filling. As you get the correct shape, lightly bond the two sheets together (but don’t press).
Once I’ve finished bonding and shaping, I like to go through with my bench knife and do some further shaping of the fillings. I find that the ravioli looks nicer and makes cutting easier.
Process - the cutting
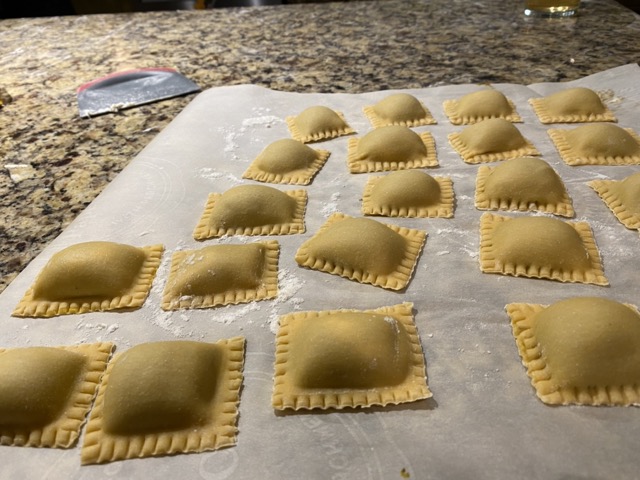
With your bench knife, cut the ravioli leaving just enough room around the filling to seal. I make my cuts pretty close to the filling but experiment a bit here. With the very tips of a fork, go around the ravioli and press the two sides into each other. Doing so seals the ravioli and gives it a decorated shape. Set aside on a floured surface for cooking.
Process - the cooking
Fresh pasta only takes a couple minutes to cook. 2 minutes max in very salty boiling water. All done!